ENGINE DISASSEMBLY
-
Remove the left hand push rod while holding your other hand under
the clutch assembly. When the rod is removed, the ball bearing will
roll out of the main shaft into your hand.
-
Remove the right-hand push rod by pulling it outward from the oil seal
in the center of the transmission drive sprocket.
-
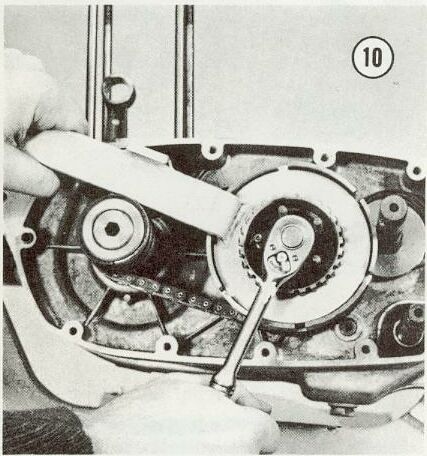
Use tool number 999-204 to hold the clutch (see Figure 10). Fit the
tool in the clutch hubs and rotate the clutch counterclockwise until the
handle of the tool rests on top of the cush drive assembly.
-
Remove the clutch nut with a 22 mm socket.
-
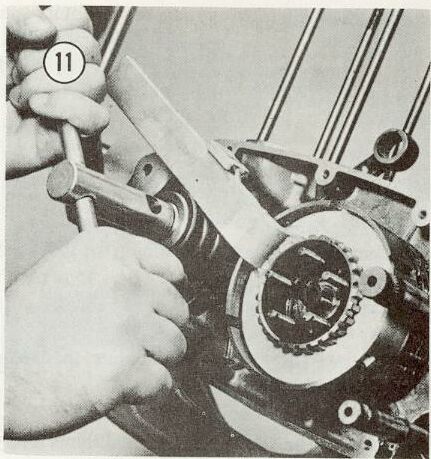
Leave the clutch holding tool in position and use tool number 999-210 on
the cush drive Allen nut (see Figure 11)
-
Remove the Allen nut, lock washer, outer spring stop and outer coupling
cam from the cush drive assembly.
-
Remove the inner clutch hub. The hub may not pull off the main shaft easily,
due to excess Loc-Tite from the clutch nut collecting between the shaft
and the hub. Soften the Loc-Tite by -heating the area where the hub
joins the main shaft with a propane torch. Then remove hub.
-
Remove the outer clutch hub, primary chain, and engine sprocket as a unit.
-
Remove the inner race of the clutch needle bearing, the inner hub spacer,
and the large flat washer from the transmission shaft.
-
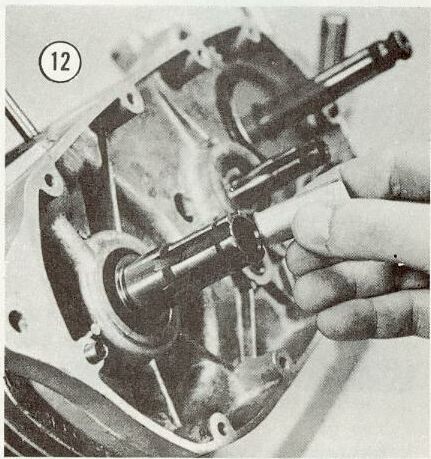
Several special tools are required to remove' the cush drive shaft, which
is press fit on the primary side of the crankshaft.
-
Screw the thread protector, tool number 999-214, into the crankshaft threads
(see Figure 12).
-
Fit the spanner tool number 999-215 on the cush drive shaft (see Figure
13).
[previous page] [index]
[next page]