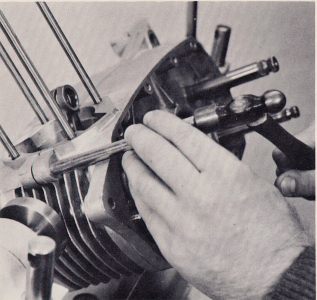
FIG. 14
NOTE: A short piece of 3/8" rod can be used as a drift for removing the front pin. A similar piece of 1/2" rod will suffice for the two rear pins.
FIG. 14
5. With the left side of the engine still facing upward, gently tap
the right end of the crankshaft with a rubber or plastic mallet until the
cases begin to separate. Then, grasp the left case with your hands and
slowly, but firmly, lift if off (Fig. 15). The crankshaft will remain in
the left hand case; the transmission should remain intact in the right
hand case. The transmission shafts may try to stay in the left case. If
they do so, gently push them back down into the right hand case while you
are lifting the left case off. Do not allow any of the shafts, other than
the crankshaft, to be withdrawn more than 1/4" from the right hand case.
If this occurs, it could allows shims to fall off the right end of the
shafts, making
them difficult to identify when you reassemble the gearbox.
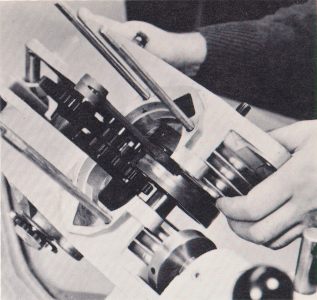
FIG. 15
6. After you remove the left engine case and before you set it aside, check inside of the case on the mounting bosses of the mainshaft, layshaft, shift drum, and kick starter shaft. Occasionally, shims will stick to these bosses when the case is removed. If they have done so, remove them and put them on their respective shafts.
7. Remove the crankshaft shimming washers from either the right end of the crankshaft or the right main bearing and tag them.
NOTE: The amount of play in each shaft in the gearbox and crankshaft
is important. The factory adjusts each gearbox separately, adding shim
washers where needed to gain the proper end play and gear engagement. The
crankshaft is also individually adjusted for proper centering and end play.
These shims come in different thicknesses. Do not get the shims mixed up,
as this will make the job of reassembly more difficult.
Page 9