FIG. 116
16. Slide the kickstarter lever onto the kickstarter shaft and bolt it into place. While holding the cylinder firmly in place, operate the kickstarter and check to be sure that the piston can move freely.
17. Inspect the mating surfaces of the cylinder head and the top of the cylinder. Make certain these two surfaces are smooth and clean.
18. Place a new head gasket on the cylinder and center it on the top of the liner.
NOTE:
(a) 250cc TT and DM R engines use a 1 mm
thick head gasket.
(b) 250cc Pioneer and Stiletto engines use a
2 mm thick head gasket.
(c) 25Occ Plonker engines use a 3 mm thick
head gasket.
(d) All 175cc engines use a 1 mm thick
head gasket.
Be sure you have the correct gasket for the engine you are assembling.
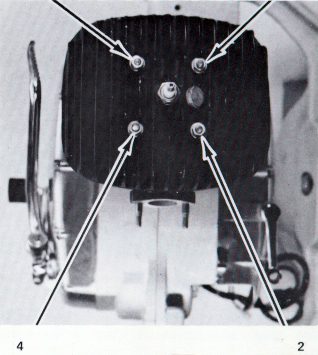
19. Slide the head down the studs into place on the cylinder. The higher ends of the cooling fins are on the front of the head. Fit the flat washers to the cylinder studs and mo6nt the four 12 mm nuts, turning them down finger tight.
FIG. 116
NOTE: If you attempt to tighten the cylinder heads in any other sequence, without a torque wrench, or with a torque wrench that is not accurate at very low readings, you run the risk of warping the cylinder head or causing piston seizure due to cylinder distortion.
21. Install a new sparkplug of the correct type and heat range and tighten it finger tight.
22. Cover the intake and exhaust manifolds to prevent trash from entering the engine while you are handling it.
Page 80