FIG. 93
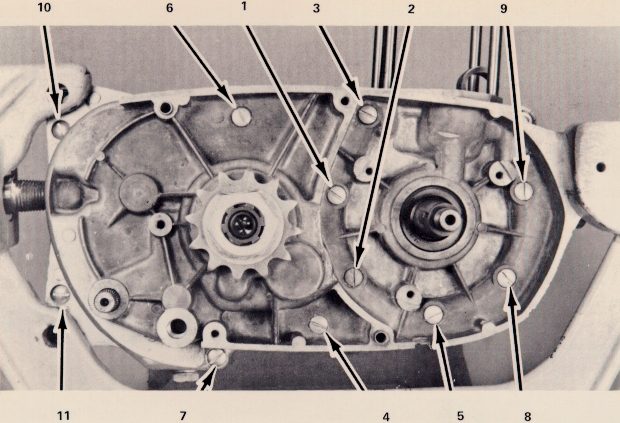
12. Turn the engine so that the magneto side of the engine cases faces towards you. Put the nine long and two short engine case screws in place (Fig. 93). Using a large screwdriver, turn the screws inward until they are just snug. Do not tighten them until all the screws are snug.
13. Using the sequence shown in Fig. 93, tighten each screw firmly, using a large screwdriver or impact screwdriver. Torque the front engine case nut and bolt to 12 ft. lbs., or 150 inch lbs.
14. Install the complete shift drum cletent assembly, turning it all the way in with your fingers. Do not force it. If it seems to bind
FIG. 93
when you turn it in, remove it, check the plunger for freeness, and try installing it again. Tighten it with a large screwdriver only after it has been turned all the way in with your fingers.
15. Install the felt washer and protective rubber cap on the right end
of the selector shaft.
1. Turn the engine so that the primary side of the cases faces up. Grasp the kickstarter shaft and turn it counterclockwise as far as it will go, until the long slot on the shaft is facing upward.Installing The Primary Side Components
2. Fit one of the large flat washers onto the
Page 66