FIG. 7
FIG. 7
4. Remove the primary case gasket and the two locating guide pins. If these pins are stuck in their holes, they may be left in, but care should be exercised when handling the engine to avoid damage to them.
5. Remove the spring washer and the flat washer from the selector shaft
.
6. Using needle nosed pliers, straighten and remove the five cotterpins
from their studs on the clutch assembly.
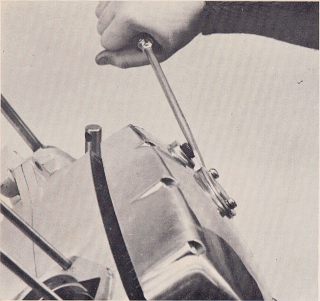
7. With a spanner screwdriver, remove the five clutch spring nuts. Remove
the springs and
spring cups.
NOTE: The spanner screwdriver can be made by cutting a notch in the tip of a large screwdriver as shown in Figure 7A. If this is not possible, the nuts can be loosened with needle nose pliers, being careful not to damage the slots in the nuts. Just use the pliers to loosen the.nuts until they are slightly higher
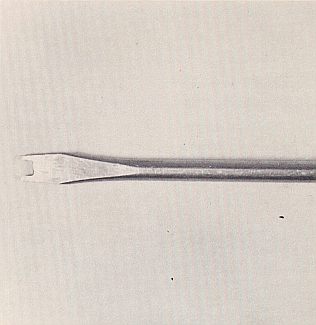
FIG. 7A
than flush with the ends of the studs. A regular screwdriver will then be sufficient to remove the nuts.
8. Remove all of the clutch plates. The last, or inner clutch plate will probably remain in the assembly. Using two very small thin screwdrivers, remove this plate by putting the screwdrivers under the plate 1800 across from each other, and lifting it out.
9. There are two clutch push rods that run through the center of the
transmission main shaft. These push rods are separated by a small ball
bearing. Remove the left hand push rod by tilting the engine so that the
primary drive side is facing downward. Slowly withdraw the left
Page 5