FIG. 62
1 . Thoroughly clean the cylinder and piston assembly. Visually inspect the cylinder for gouges, seizure marks, and noticeable wear. Check the piston for cracks or signs of noticeable wear.Section: 5
Repairing The Cylinder And Piston
FIG. 62
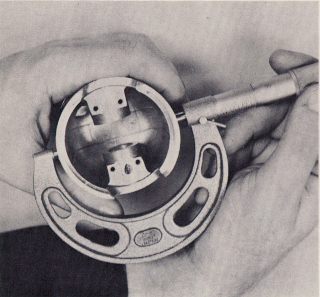
2. Check the piston to cylinder wall clearance next. While doing this, the cylinder and piston should be at room temperature. (650 to 700 F.) Measure the piston at the bottom of the skirt from front to back, as shown in Fig. 62. Measure the inside of the cylinder from front to back, approximately one inch up from the bottom of the cylinder liner as shown in Fig. 63. Subtract the piston measurement from the cylinder measurement to obtain the piston clearance.
3. Section 6 of this Chapter contains all the piston sizing information. Fig. 71 of that Section shows what the maximum allowable clearances are for each type engine. If the clearance exceeds those tolerances, the engine may just need a new piston or it may need re-boring.
4. To determine which solution is correct for the engine you are repairing, clean the top of the old piston until you can find the number stamped on it (Fig. 64). Then, compare the measured size of your piston with the size of an equivalent new piston, as given in the chart, Fig. 70, Section 6. If your piston measures less than the new one, subtract the size of the new piston from the inside diameter of your cylinder, and if the resulting clearance is within the allowable limits for your engine as shown in Fig. 71 of Section 6, then the
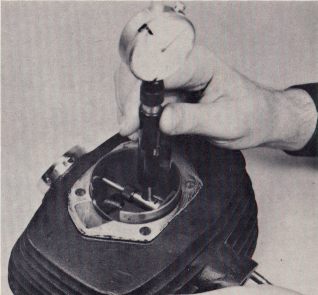
FIG. 63
Page 48