FIG. 182
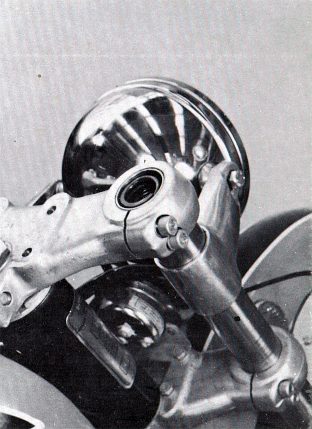
FIG. 183
Page 142
1 . Apply a light film of oil or grease to the inside of the fork seals and dust covers. Slide the covers down over the fork legs and push them over the slider legs until they snap into place.Section 5:
Reassembly of the Front Suspension
2. On Pioneer and Stiletto models, the left fork has a mounting lug for the brake anchor strap on the fork, and it faces the front of the machine. The right-hand fork has no mounting lugs.
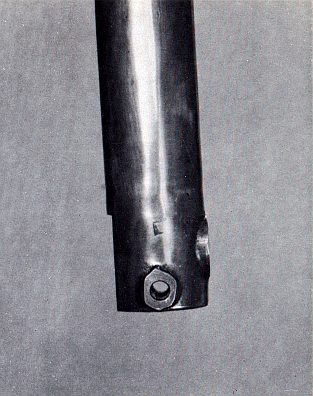
3. On Plonker models, both of the forks each have two fender mounting lugs; therefore, it is very possible to get the forks mixed up. To mount the forks correctly, look closely at the bottom of each, slider leg at the axle mounting bosses. You will notice that one side of this mounting boss is machined flat. This is the inside of the fork. (Fig. 182) Also, the drain screws should also point rearward.
4. Grasp one of the forks by the fork tube just above the slider leg. Start it up through the bottom yoke, twisting it back and forth while pushing upward.
5. On Pioneer and Plonker models, slide the tube through the headlight bracket.
6. Continue pushing the tube upward until the top of the tube (not the stanchion nut) is flush with the top of the upper yoke. (Fig. 183) Turn one of the 6 mm fork pinch bolts on the upper yoke until it is snug. Do not tighten it.
7. Install the other fork assembly in this same manner.
FIG. 182
FIG. 183
Page 142