FIG. 158
1. Drain the fork oil as described in Paragraphs 1, 2, and 3 of Section 1. Prop the motorcycle so that the front wheel is off the ground. Turn the brake cable adjuster on the front brake lever to give the cable its maximum amount of free play. Remove the cable nipple from the brake arm on the front wheel, then pull the cable up out of the cable stop.Section 1:
Removal of the Forks and Steering
Components
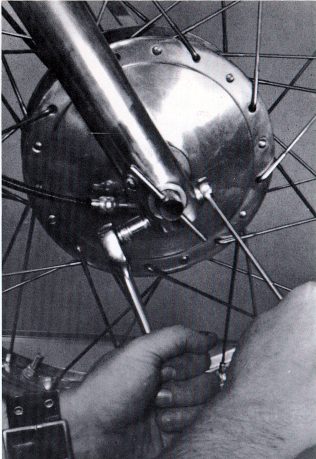
2. Remove the two 10 mm nuts and bolts that secure the brake anchor strap to the left fork leg. Loosen and remove the 22 mm axle nut and lock washer. Loosen and remove the 13 mm axle pinch bolt and nut from each fork leg. (Fig. 158)
3. Grasp the axle by the T handle on one end and while twisting it back and forth, draw it out of the forks and wheel. Remove the front wheel. On Pioneer and Plonker models disconnect the speedometer drive unit from the cable and remove the unit.
NOTE: It is not necessary to remove the complete fork tube assemblies from the machine to service them. The oil seals, fork slider legs, and damper assemblies can be removed from the fork tube while the tube is still in place on the motorcycle. However, the procedures given here outline the removal of the entire fork leg units and their disassembly once so removed. If it is not necessary for you
FIG. 158
4. Stiletto and TT Models. Remove the front number plate by removing the elastic rubber band securing it and snapping the plate off the fork tubes.
Pioneer and Plonker Models. Loosen the bolts that secure the headlight brackets to the fork tube. On Pioneers only, remove the speedometer and bracket by loosening and removing the 25 mm stanchion nut which secures the bracket on the top of the right fork tube. After removing the bracket, thread the stanchion nut back into the tube three or four turns by hand.
Page 128